There’s something truly magical about growing dahlias their vibrant colors, bold shapes and the joy they bring to any garden. But if you’re like me, you want to enjoy those beautiful blooms year after year without having to buy new plants every spring. Learning how to save dahlias isn’t just a gardening task it’s a heartfelt tradition I’ve embraced over the years.
I remember the first time I carefully dug up my tubers after a long summer, feeling a mix of nervousness and hope. Saving dahlias is both a science and a little bit of an art and once you get the hang of it you’ll be amazed at how rewarding it can be. Let me guide you through the process with all the tips and tricks I’ve learned, so your dahlias can come back healthier and stronger every season.
Why Saving Dahlia Tubers Is Worth It
Are Dahlias Annual or Perennial?
One of the first questions I always get is whether dahlias are annuals or perennials. The answer depends largely on where you live and how you care for them. In warmer U.S. zones, dahlias can behave like perennials, coming back year after year in the same spot. But in most regions, especially where winter freezes hit hard, dahlias are treated as tender perennials or even annuals because their tubers can’t survive freezing soil temperatures.
That’s why saving dahlia tubers by digging them up and storing them properly during the cold months is crucial. Without this step, your favorite plants won’t make it through the winter and you’ll have to start fresh every spring.
Save Money and Preserve Your Favorite Varieties
Dahlias come in such a stunning array of shapes, colors and sizes and many gardeners develop real favorites. I still remember the first dahlia variety I fell in love with a fiery red cactus dahlia that always stole the show in my garden. Saving your tubers means you don’t have to spend money replacing plants each year, which adds up quickly if you love collecting different varieties.
Plus, it’s a great way to preserve unique or heirloom dahlias that might be hard to find in stores or nurseries. Keeping those tubers safe through the winter ensures your garden stays personalized and special every year.
Grow Bigger and Better Blooms Each Year
Here’s a little secret: saving dahlias isn’t just about survival it’s about helping your plants grow stronger. When you dig up tubers and store them properly, you can divide and select the healthiest pieces to replant. This practice encourages growth and often results in larger, more vibrant blooms the following season.
Over time, your dahlia collection can become more robust and beautiful than ever a living testament to your care and patience.
When to Dig Up Dahlias
Watch for the First Frost
Knowing the right time to dig up your dahlias is key to saving them successfully. Generally, you want to wait until after the first hard frost has blackened the foliage. In my garden, this usually happens in late October or early November, depending on the year.
The frost signals the tubers to go dormant, making them ready for digging. If you try to dig up tubers before the frost they might still be actively growing, and the process could damage them.
Signs That Your Dahlias Are Ready
Besides frost, you’ll notice other signs that your dahlias are ready to be lifted. The leaves and stems will start to yellow and die back naturally. This dying back is a cue that the plant is shutting down for the season and that the energy is stored safely in the tubers underground.
If you see these signs, it’s time to prepare your tools and get ready for digging.
Why Timing Matters for Healthy Tubers
Timing your dig is more than just a calendar check it affects the health of your tubers for the next season. Digging too early might result in small or underdeveloped tubers. Digging too late risks rot or damage from freezing soil.
I always recommend waiting until a few days after a hard frost and when the ground is still workable but before heavy freezes set in. This balance helps keep your tubers firm, healthy and ready for storage.
Tools and Supplies You’ll Need
Essential Tools for Digging and Cutting
Before you start digging, make sure you have these tools ready:
- A sturdy garden fork or spade for carefully lifting tubers without cutting them
- Sharp garden scissors or pruning shears to trim back the foliage after digging
- Gloves to protect your hands from dirt and sharp stems
Having the right tools makes the process smoother and protects your precious tubers from damage.
Storage Materials (Peat Moss, Sawdust, etc.)
Once your tubers are dug up and cleaned, they’ll need a cozy, breathable medium to keep them safe over winter. Many gardeners, myself included use peat moss or dry sawdust to gently pack the tubers. These materials help keep moisture balanced not too wet, not too dry which prevents rot and shriveling.
Other options include vermiculite or shredded newspaper but peat moss remains my go-to for its moisture-retaining yet airy qualities.
Optional Items for Easier Handling and Labeling
To stay organized and ensure you know which tuber belongs to which variety next spring, consider:
- Paper bags or plastic containers for individual tubers or clumps
- Waterproof markers or plant tags to label each tuber clearly
- A cool, dark storage space like a basement or garage shelf where temperature stays around 40–50°F (4–10°C)
Keeping your tubers labeled and stored properly saves headaches and confusion when it’s time to plant again.
How to Dig Up Dahlia Tubers Without Damaging Them
Cutting Back the Stems
Once the foliage has been blackened by frost and is completely dried, I always start by trimming the stems back to about 4-6 inches above the ground. This makes it easier to dig around the tubers without getting tangled in stalks. Use clean, sharp garden scissors or pruners to make a neat cut. It’s like giving your dahlias a little haircut before their winter rest.
Loosening the Soil Around the Clump
Next, gently loosen the soil around each dahlia clump. I find a garden fork works best here insert it about 6-8 inches from the main stem and carefully work the soil loose in a circle. Be patient and slow, because tubers often spread out underground and you don’t want to accidentally cut or bruise them.
Lifting the Tubers Gently
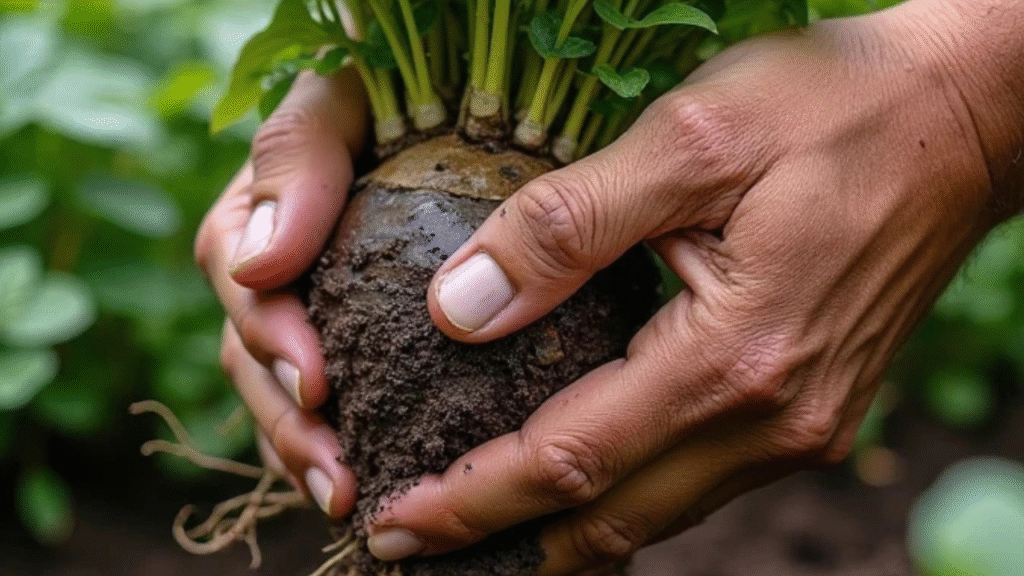
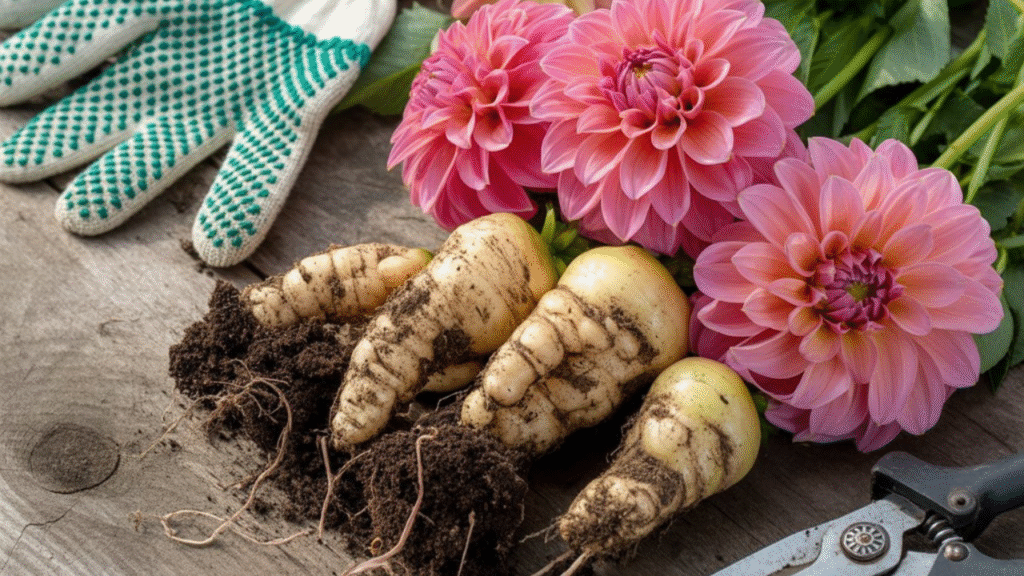
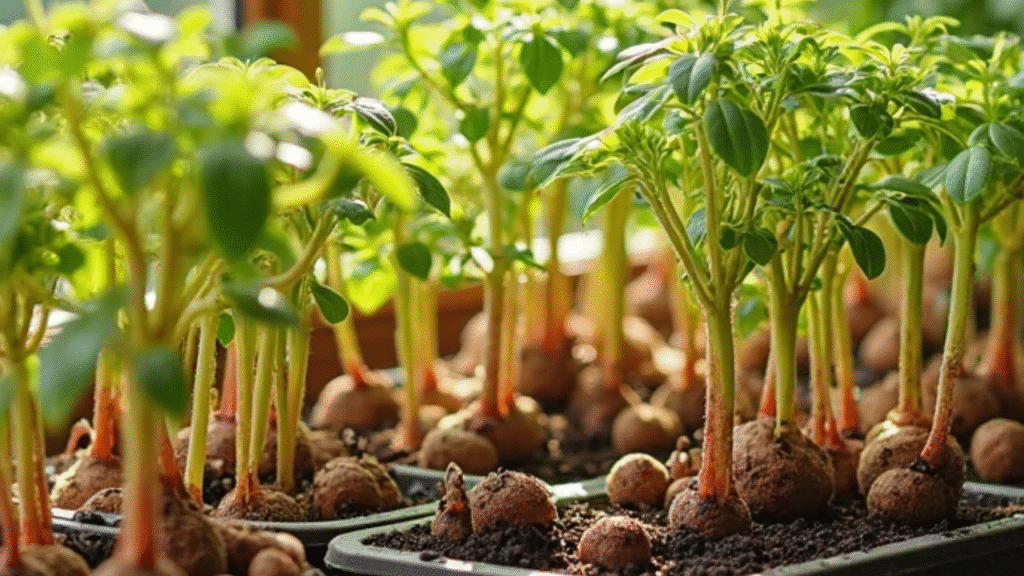
After the soil is loose, carefully lift the entire clump out of the ground, keeping as much soil around the tubers as possible. If some dirt falls away, that’s okay just handle the tubers gently by the base, never pulling on the stems. This careful approach protects the tubers from bruising or breaking.
What a Healthy Tuber Clump Looks Like
Healthy tubers are firm and plump with smooth skin. You might notice little “eyes” or buds those are what will sprout new stems next year. Avoid tubers that feel soft, mushy, or have black spots, as these could be signs of rot or disease. I always separate the healthy from the questionable ones right after digging to prevent any problems during storage.
Cleaning and Drying Your Tubers
Rinsing Off the Soil
Once the tubers are dug up, I gently shake off excess soil and rinse them under cool water. This helps you see the tubers clearly and check for any damage. But don’t soak them too long a quick rinse is enough. Pat them dry with a clean towel or let them air dry for a few hours.
Drying Techniques to Prevent Rot
Proper drying is essential to avoid rot during storage. After rinsing, spread your tubers out in a warm, airy spot like a well-ventilated room or covered porch away from direct sunlight. I like to give mine a week or so to cure, turning them occasionally to ensure all sides dry evenly.
How Long Should You Let Tubers Cure?
Tubers need around 7 to 14 days to cure properly. The goal is to harden their skin and heal any small wounds from digging. This curing process helps protect tubers during the colder months. If the environment is humid, you might want to extend drying time or use a fan for better air circulation.
How to Store Dahlia Tubers for Winter
Best Storage Containers (Boxes, Bags, Crates)
When your tubers are dry, it’s time to pack them for winter storage. I prefer shallow cardboard boxes or wooden crates with plenty of ventilation. Avoid airtight containers, which can trap moisture and cause mold. Paper bags can also work well for individual tubers or small clumps.
Recommended Fillers: Peat Moss, Vermiculite, etc.
Fill your containers with a dry, breathable medium like peat moss, vermiculite or dry sawdust. These materials help keep the tubers from drying out completely while preventing excess moisture buildup. Lightly cover the tubers to cushion them and maintain consistent moisture levels.
Ideal Temperature and Humidity for Storage
Dahlia tubers like cool, dark and slightly humid conditions. Aim for temperatures between 40-50°F (4-10°C) and moderate humidity not too dry, not too damp. Basements, unheated garages or cool closets often make perfect storage spots.
Where to Store Tubers (Garage, Basement, Closet)
Your storage location should be frost-free and away from direct sunlight. I’ve stored tubers successfully in my basement shelves and even in a spare closet during winter. Just make sure the spot is dry, cool and well-ventilated to keep your tubers healthy until spring.
Quick Checklist: How to Save Dahlias Successfully
Here’s a simple step-by-step list you can follow each fall to save your dahlias the right way:
- Wait until the first hard frost blackens the foliage.
- Cut stems down to 4–6 inches above ground.
- Use a garden fork to loosen soil around the clump.
- Gently lift tubers out, avoiding bruises or cuts.
- Rinse tubers and allow them to dry 7–14 days.
- Inspect tubers for rot or damage and discard unhealthy ones.
- Pack healthy tubers in peat moss, sawdust, or vermiculite.
- Label each variety with tags or markers.
- Store in a cool, dark, well-ventilated space (40–50°F).
- Check monthly and remove any shriveled or moldy tubers.
Labeling and Organizing Stored Dahlias
Why Labeling Matters
If you’re anything like me, you might grow several dahlia varieties each year, and forgetting which tuber is which can lead to some disappointing surprises come planting time. Labeling helps you keep track of each variety’s name, bloom color and any special care notes.
Easy Ways to Tag and Track Varieties
I use waterproof plant tags stuck in the storage containers or simple paper tags tied with twine around the tuber clumps. Some gardeners also write directly on the container with a permanent marker. Whichever method you choose, clear and consistent labeling makes spring planting stress-free.
Creating a Simple Storage Inventory
For extra organization, keep a small notebook or digital file listing all your tubers in storage include variety names, dates stored and any notes on tuber condition. This inventory saves time and ensures no precious tuber gets forgotten over the winter.
Troubleshooting Common Storage Problems
Preventing Mold and Rot
Even with the best care, mold and rot can sometimes sneak in. To prevent this, always store your tubers in a cool, dry and well-ventilated spot. Avoid plastic bags that trap moisture and check your tubers every few weeks. If you spot any soft or moldy areas, gently cut them away with a clean knife to stop it from spreading.
What to Do If Tubers Shrivel
Sometimes tubers lose moisture and start to shrivel during storage. If this happens, don’t panic. You can try lightly misting them with water and then re-burying them in dry peat moss or vermiculite to help restore some moisture. Keep monitoring them closely to avoid rot.
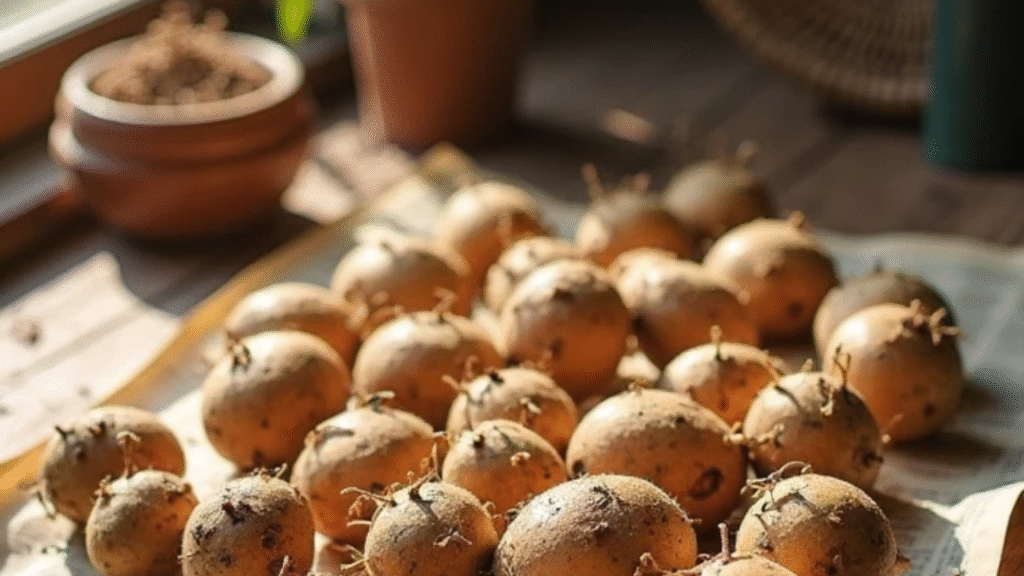
Spotting Early Sprouts Good or Bad?
If your tubers start sprouting small shoots during storage, it can be a good sign they’re healthy and ready to grow. However, if sprouts appear too early, before you’re ready to plant they can dry out or become weak. You can carefully trim these early sprouts back to keep the tubers dormant a little longer.
Can Damaged Tubers Be Saved?
If you find tubers with small bruises or cuts, they might still be salvageable. Let the wounds dry and callous over before storing. For more extensive damage or rot, it’s best to discard those tubers to protect the healthy ones from contamination.
When and How to Replant Stored Dahlias in Spring
Checking Viability After Winter
As spring approaches, it’s time to check on your stored tubers. Healthy tubers should feel firm and may show signs of small green shoots or “eyes.” Soft or mushy tubers should be discarded. This check ensures you only plant the strongest tubers for a successful season.
Waking Tubers Up Early (Pre-Sprouting)
If you want to get a jump start on the growing season, you can “pre-sprout” your tubers indoors. Place them in a warm spot (around 70°F/21°C) with indirect sunlight, lightly moistening the storage medium. In a few weeks, you’ll see sprouts emerge, and your dahlias will be ready to plant as soon as the danger of frost passes.
Potting Indoors vs. Direct Ground Planting
Some gardeners prefer to pot up sprouted tubers indoors before transplanting them outside, which helps protect young plants from unpredictable weather. I’ve found success both ways, but potting indoors allows you to monitor growth closely and gives dahlias a strong start.
Tips for Strong Spring Growth
Once planted, give your dahlias plenty of sunlight (at least 6 hours daily), regular watering and balanced fertilizer to encourage lush growth and vibrant blooms. Supporting taller varieties with stakes early helps avoid breakage. Watching your plants grow from those saved tubers is truly one of gardening’s greatest joys.
Dahlia Storage Comparison Table
| Storage Factor | Ideal Condition | Why It Matters |
|---|---|---|
| Temperature | 40–50°F (4–10°C) | Prevents freezing and sprouting |
| Humidity | Moderate (40–60%) | Avoids tuber shriveling or rot |
| Filler Material | Peat moss, sawdust, vermiculite | Keeps tubers cushioned and moisture-balanced |
| Storage Container | Cardboard box, crate, paper bag | Breathable to prevent mold buildup |
| Location | Basement, garage, cool closet | Stable environment with minimal fluctuation |
Conclusion: A Gift from One Season to the Next
Saving dahlias might seem like a lot of work at first, but I promise it becomes second nature and the reward is absolutely worth it. There’s something so special about seeing your very own tubers come back to life each spring. It’s like receiving a gift from last season’s garden, packed with love and promise.
I still get a little thrill when I dig into the storage boxes and see those knobby little miracles waiting to grow. Whether it’s your first time saving tubers or your tenth just remember each step you take is a step toward a fuller, more beautiful garden one that’s built with your own hands and heart.
You’ve got this. And I’ll be right here cheering you on, one bloom at a time.
With dirt under my nails and a big flower-loving heart,
Flora Lane
FAQs
Can You Leave Dahlias in the Ground Over Winter?
In warmer zones, yes, dahlias can sometimes be left in the ground. But in most U.S. regions with freezing winters, tubers left in the soil risk freezing and rotting. Digging and storing tubers is the safest way to ensure your dahlias return each year.
How Long Can You Store Dahlia Tubers?
Properly stored tubers can last 6 months or more through winter. The key is maintaining cool temperatures and moderate humidity, checking regularly for any signs of rot or shriveling.
Do You Have to Divide Tubers Every Year?
Dividing tubers is recommended every 1-2 years to keep plants healthy and encourage larger blooms. You can divide when digging tubers in fall or when repotting in spring, selecting the healthiest sections for replanting.
What If You Forget to Dig Them Up?
If you forget to dig up your dahlias before the first hard freeze, there’s a risk the tubers will freeze and die. However, if the frost is light or the ground insulated, some tubers might survive. Next spring, carefully dig and check tubers any healthy ones can be replanted.